Saturday, August 30, 2014

Winnie & Walter Tour of Stars - August new release!


Winnie and Walter are releasing three new stamp sets today. They are bigger sets. They are called A Tree for all Seasons, Moonlight and This Awesome House.

They are available for purchase now from Winnie & Walter shop.I am sure you are going to enjoy the new sets because they are fantastic.

First up, I have a card I made using This Awesome House stamp set and A Tree for all Seasons.

Bless this house vertical

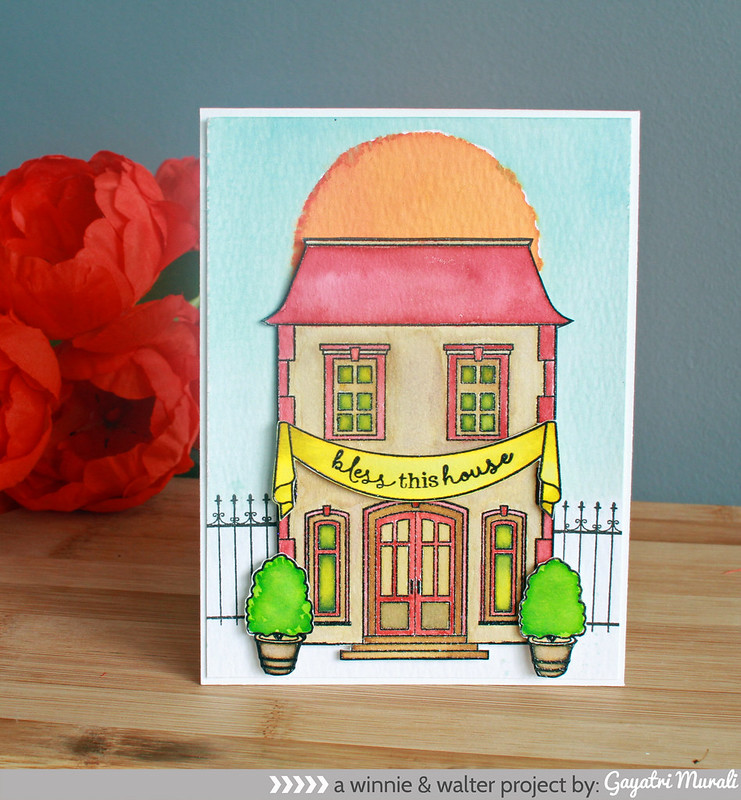
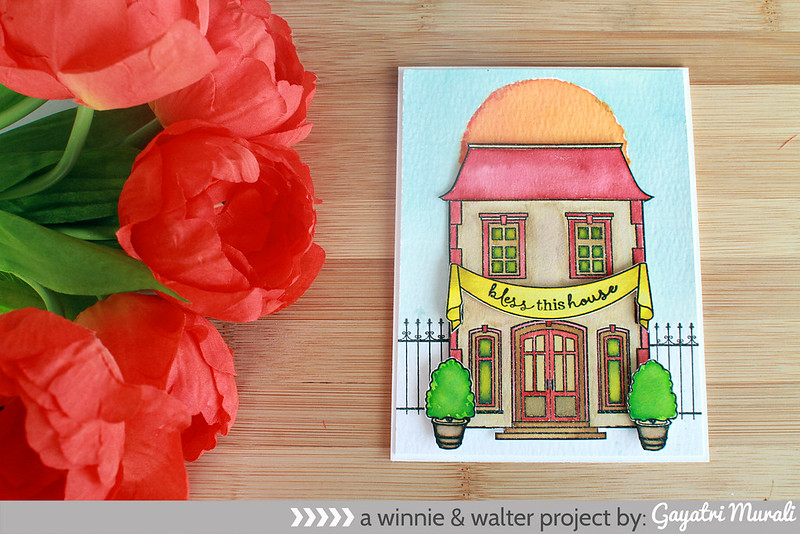
I absolutely love the house on the This Awesome House stamp set and all the cute accessories that can be used to build you own scenery. I have used watercolour paper to heat emboss my house, potted plants and banner, colour them and cut them out. I then created a soft sky by colour washing on a watercolour paper, stamped the fence and stamped and watercoloured the large sun on the background. I then layered the house, potted plants and banner with sentiment stamped on it. Here is another shot of the card.

Bless this house flat


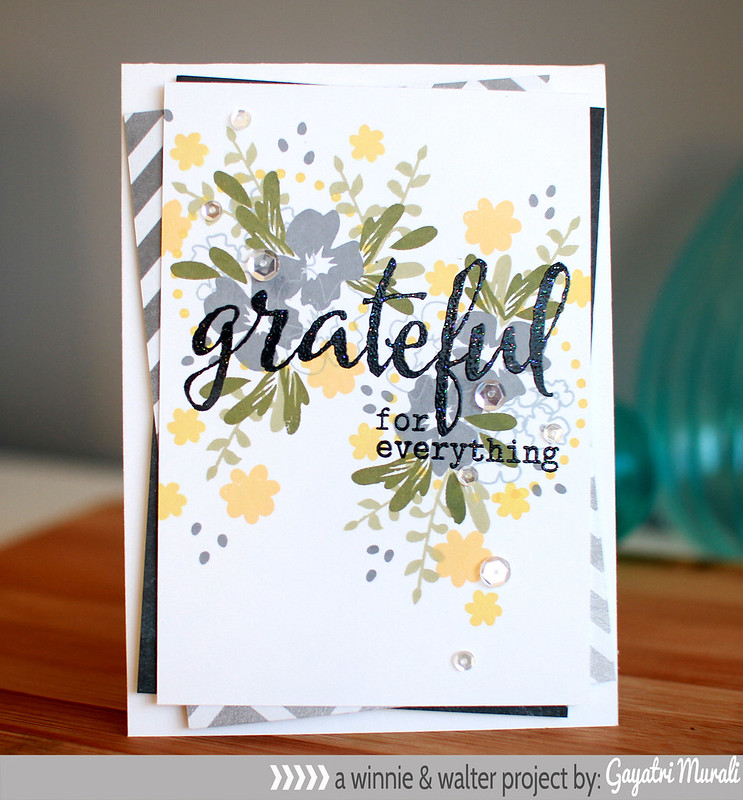
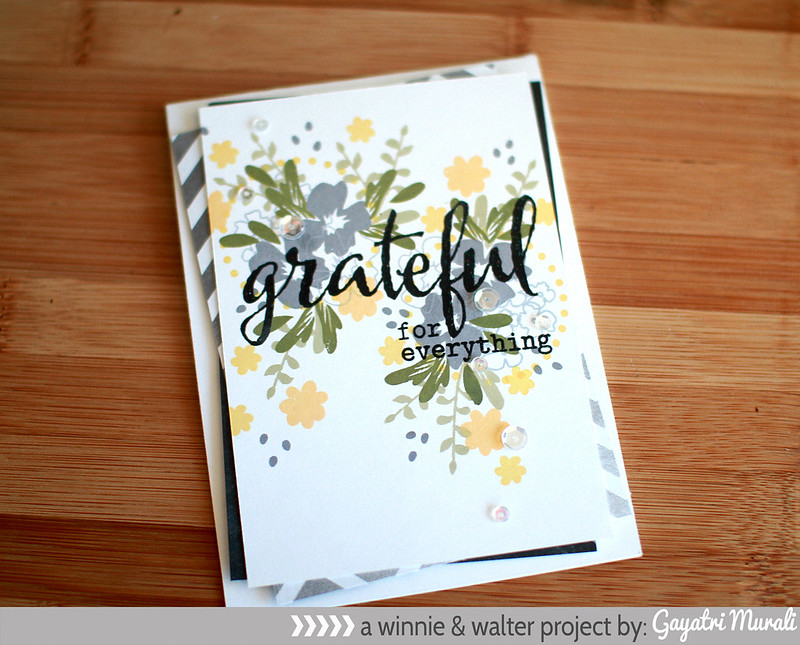
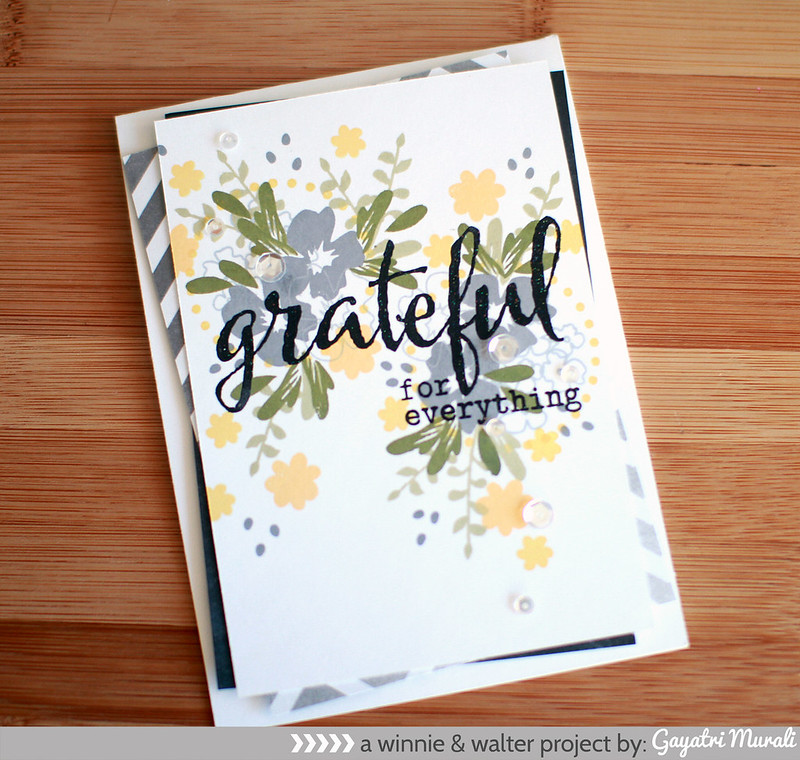
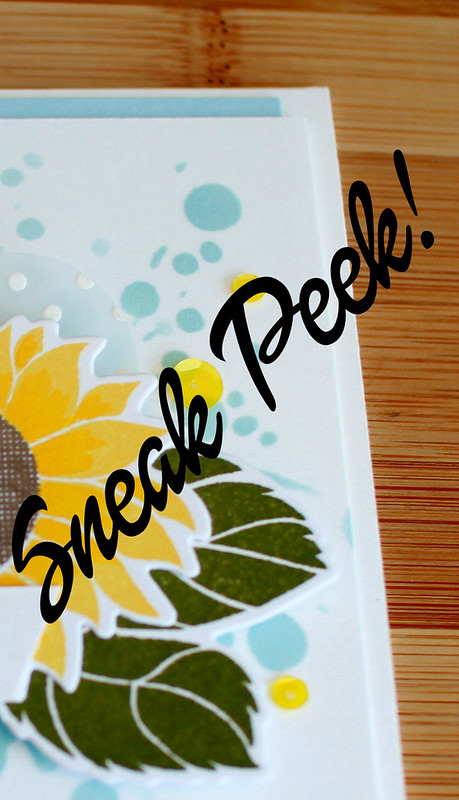
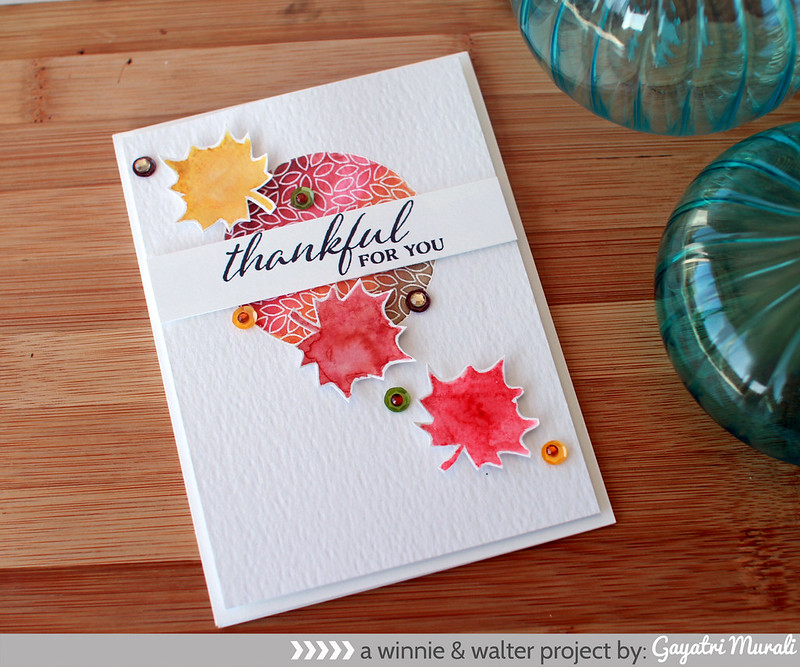
My second card here uses A Tree for all Seasons.

Thankful for you vertical

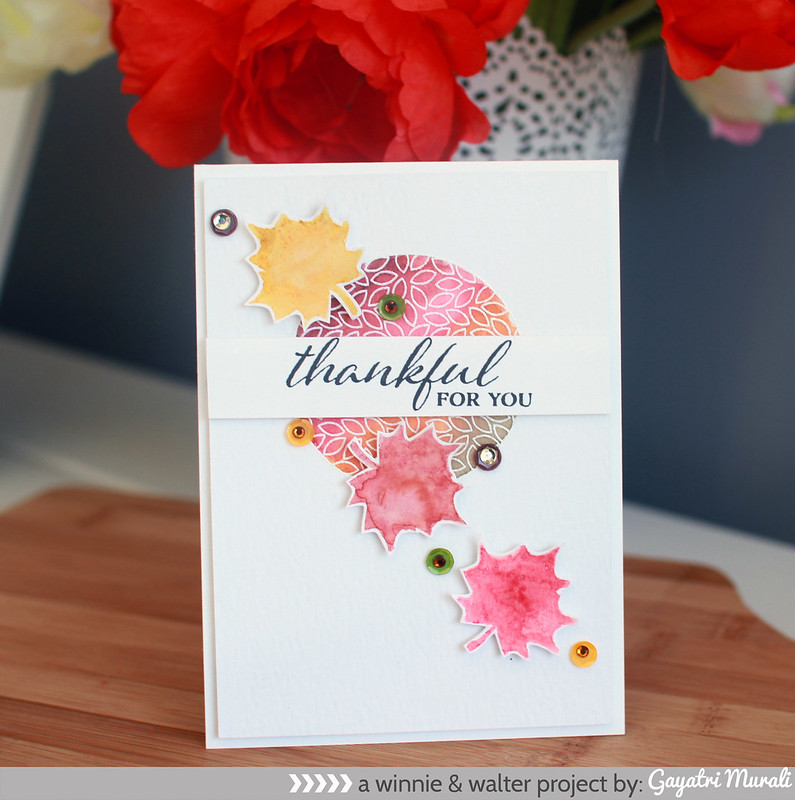
The centre leaves circle is white heat embossed and water coloured with fall colours. I then stamped the leaves using fall colours by inking with distress inks and misting with water. Once dry I cut them out. Stamped the sentiment on a strip of white cardstock. I have layered the sentiment strip going through the middle of the heat embossed stamped image. Then scattered the leaves. Finally used Pretty Pink Posh's Marigold, Mossy Green and Espresso sequins. I have also added some rhinestone to the middle of the sequins for some bling.

Thankful for you flat full

Hope you enjoyed my projects using the new stamp sets from Winnie & Walter.

Check out Winnie and Walter Blog for more inspiration from Shay, Julie, guest designers and design teams. There are prizes to giveaway. Make sure to leave a comment  between August 29, 2014 at
8:00 p.m. CST until August 31, 2014 at 11:59 p.m. CST. Winner will be randomly picked from any of the blogs 

Thanks for stopping by. Have a great weekend!

My blog signature

Friday, August 29, 2014

Share the love week featuring Simon Says Stamp - Day #5


Today is the last day of Winnie & Walter's Share the LOVE week featuring Simon Says Stamp. Hope you are enjoying the collaborative work between the two companies as much as I am :)


Today we have a sketch theme. Here is the sketch for you :)


If you are following my work, especially my Winnie & Walter projects, you will remember the inspiration for this sketch. ;) Ok here is my card I made for Winnie & Walter's The Big, the Bold and Blessings stamp set release recently.

Grateful card 1

Here is my new take on the sketch.

Grateful vertical 2

This time, I picked my colour inspiration from one of my paper pads. It has black, grey, two shades of yellow and green. The flowers and leaves stamps are from Simon Says Stamp Thinking of You stamp set and Winnie & Walter's The Write Stuff: Leave it to Mum stamp set. I have stamped and layered the flowers and leaves in shades of greys, greens and yellows. I really love this colour combinations. All the inks were from Simon Says Stamp as well.

Grateful flat 2
I then stamped the sentiment with Versafine black ink and heat embossed. The back contrasts the subtle colours on the background. I thought a few Sparkly Clear sequins from Pretty Pink Posh is essential to the panel. I have then layered the panel with pattern paper on the background before I have taped the layers on the card front. Here is a close up!

Grateful flat1

Now if you like to see more cards using the sketch from the DTs, head over to Winnie & Walter blog. Make sure you leave comments on everybody's blog. There is a $25 gift certificate prize from Simon Says Stamp. Yay!

My blog signature

Thursday, August 28, 2014

CAS(E) this Sketch #90 challenge and a farewell!


This is my third post for today. Here is my Random card post and Winnie & Walter post.

I have a new sketch from CAS(E) this Sketch challenge blog for you today.
This fab sketch is by Chrissy Larson.


And this is how I interpreted it.

Happy Birthday Gebera vertical

 I sat down to make the card this morning. And I had planned something geometric with some inlayed diecut. But I found, Jennifer McGurie's video today using Peerless watercolour on her blog. So I watched the video and got inspired to try the technique. I am a bit restless today and so I was not up to colouring a smaller image. Hence I choose  these large Gerbera flowers and leaves from Uniko Studio's Pure Floral Gerbera stamp set.I have white heat embossed them on watercolour paper from Tim Holtz. Then broke open my Peerless water colour and coloured the flowers and leaves. I am intrigued by Jennifer's use of Perfect Pearl water. I remembered I had one such pot hiding somewhere in my drawer. I found it and used it on my watercoloured flowers and leaves. Just love the shimmer it gives. Subtle and pretty. Thanks for the video, Jennifer. I love your work and your videos always and forever :) Here is a close up!

Happy Birthday card closeup!

 For the background, I have used a wooden plank pattern paper from My Mind's Eye. I mounted the watecoloured panel as per the sketch. I love the contrast the yellow and green against the woodgrain plant background. I wanted a sentiment which is not too big but subtle. So the nearest I could reach for was from MFT's Typewriter stamp set lol! Finally few of the gorgeous Lemon Drop and Mossy Green sequins from Pretty Pink Posh!
 
Happy birthday Gebera card

Now to the sad part - saying goodbye! I am finishing my term with CAS(E) this Sketch Challenge Blog as designer. I have been with them since the start of the challenge blog. I love CAS sketches and throughly enjoyed working with Christine and team. Fabulous group of people. Thank you so much for having me, girls :) Now I think there are plenty of designers out there who are talented and worthy of being the designer on the team. So you will see a newbie fab designer on the team from next month. Yay!

Thanks for stopping by today.

My blog signature

Share the love week featuring Simon Says Stamp - Day #4

This is my second post for today. Here is my first post.

Welcome back once again to Winnie & Walter's Share the Love week featuring Simon Says Stamp.


Hope you are enjoying the love week so far. I love the collaborating work. This is so much fun combining products. I think it produces some good outcome.

Today's theme is One-Layer cards. This is so dear to me. Although I like to add a panel to my card base, I love one layer card especially with a technique or two used in it. Here is my one layer card.

Congrats vertical 1

I have used the balloons from Simon Says Stamp Birthday Balloons stamp set and Memento Luxe inks Bahama Blue, Gray Flannel and Dandelion to stamp. Along with the balloon, I have used the Scenery: Big Bang Confetti stamp set from Winnie & Walter to fill the space and confetti colour to the card.

Congrats flat

Layered stamping is one of my favourite technique. With Memento Luxe pigment ink, the ink sits on top of the card stock and gives a bit of dimension. Just beautiful.

Congrats closeup1

Towards the bottom of the card, I have Silver heat embossed the sentiment Congrats from The Big, the Bold and You stamp set from Winnie & Walter. I think the sentiment is perfect with the balloons and confetti celebrating an achievement.

Congrats closeup

Now if you like to see more One-Layer cards, head over to Winnie & Walter blog. Make sure you leave comments on everybody's blog. There is a $30 gift certificate prize from Winnie & Walter. Yay!

I have one more post to share. So stay tuned!

My blog signature

Happy Birthday, a random card


Today I decided to finish a few cards and catch up again on DT projects. I did some planning last night. So after dropping children at school and hubby to work, I made my self a cuppa and ventured into my craft room. Well, all that planning went out of the window :( I made two cards and a tag after spending the entiring morning! One card and the tag are DT projects. One card was totally random. I don't know why I made it but I did. So I thought I will share with you and maybe if  there is any Anything Goes challenge, I will enter it in. This is my random card.

Happy Birthday card vertical

This card is not even my style of card and I did got to elaborate level to make this. lol! I started with mixing Bahama Blue Memento Luxe Ink and Tsukineko Gold Delicata ink and stamped the clock space. I then heat embossed using clear embossing powder. Then used MFT's Abstract Art and Jumbo Abstract Art stamp set to stamp blue spatter using Audrey Blue ink from Simon Says Stamp. The Palm leaves is  die cut using Hero Arts die using gold foil paper. The flower is from Prima Marketing. The Happy die cut is from Simon Says Stamp and Birthdya from MFT Typerwriter stamp set. Of course the gorgeous Sparkly sequins from Pretty Pink Posh. 
Here is another shot of the card.

Happy Birthday card flat

I like this card because this was my style when I made scrapbook pages. No, no, I am not going to restart scrapbooking but I trying to sort out my supplies for selling. Just asking my Australian and New Zealand friends, if they are interested if I make a box of goodies like stamp sets, papers, inks, embellishments and other stuff to sell. Let me know.

Thanks for stopping. I have two more post today. So see you later :)

My blog signature

Wednesday, August 27, 2014

Last week guest designing at StampNation.


This is my second post for today. Here is my Winnie & Walter post.

I am sad to say this is my last week guest designing at StampNation. It is a lovely community and a great source of inspiration. It is a good place to be. Thank you so much Catherine for having me at StampNation. It was a pleasure to guest design at StampNation.


Here is the sneak peek of my last card for the challenge.

Sneak peek last challenge

If you are new to stamping or cardmaking, Stampnation is your place to be because it has loads of tutorials, videos and a gallery of inspiration. If you are already a stamper or cardmaker, StampNation is still your place because your have an awesome group of friends with whom you can chat anything craft.  On the whole, it a great place for cardmakers. Check it out - HERE

My blog signature

Share the love week featuring Simon Says Stamp - Day #3

Welcome back to Winnie & Walter's Share the Love week featuring Simon Says Stamp.


Today's theme is all of us using just one Winnie & Walter stamp set - The Scenery: The Big Bling.
Here is my card for the theme.

Happy birthday bling card

I have used the sequins from The Big Bling stamp set to embellish my card. I have used the big speech bubble die from Simon Says Stamp which I die cut twice from a black watercolour paper. I have layered them at an angle. I also die cut the whimsical flowers from Simon Says Stamp from watercolour paper colourwashed with red and leaves with green. I bunched up some thread behind the flower before adhering. The sentiment is form birthday sentiment also from Simon Says Stamp. The sequins are from The Scenery: The Big Bling stamp set. I stamped using Tsukineko Delicata gold ink to embellish the card. Finally I thought it needed some rhinestone bling. So I have added some Hero Arts rhinestones.

Happy Birthday bling flat

Now if you like to see more cards using The Scenery: The Big Bling, head over to Winnie & Walter blog. Make sure you leave comments on everybody's blog. There is a $30 gift certificate prize from Winnie & Walter. Yay!

See you tomorrow with another share the love week card :)
My blog signature

Tuesday, August 26, 2014

Share the love week featuring Simon Says Stamp Day #2

Hello dear friends,

Welcome back to day #2 of Winnie & Walter's Share the Love Week featuring Simon Says Stamp.


Today's theme is to make a 10 minute card. To be honest, I have made very very few 10 minute card. So this is a challenge to me. So I did a great deal of planning and also had prepared a few things. Here is my card for you first.

You are Pawesome!

So for the card, I diecut the pawesome die three times. I stacked and glued them. I had all my stamps mounted on the blocks, cuttlebug, stencil, copics and inks ready to go. I also had  card base made and panel trimmed before I started. So I sponged the big paw on the centre of the white panel. Then on a scrap piece of the cardstock I stamped and colured the dog with copics. I then diecut the dog. I stamped the "you" and "are" on a strip of white cardstock which is trimmed at an angle using Winnie & Walter's The Big, the Bold and You stamp set. I mounted the dog diecut using foam. The "Pawesome" diecut is glued below the dog die cut. The are strip is glued using foam. Finally adhered the enamel hearts. The white panel is mounted on the card base using foam adhesives. Phew!!! Almost didn't make it!

You are pawesome vertical

The stamp set, die and stencil I have used are called You are Pawesome. You can get them either individually or as a pack from Simon Says Stamp shop. Here is a closeup! I love the raised Pawesome die cut.

you are pawesome closeup

Now if you like to see more 10 minute cards, head over to Winnie & Walter blog. Make sure you leave comments on everybody's blog. There is a $30 gift certificate prize from Winnie & Walter. Yay!

See you tomorrow with another share the love week card :)

My blog signature

Monday, August 25, 2014

Share the Love week featuring Simon Says Stamp - Day #1

Hello everybody,

Welcome to Winnie & Walter's Share the Love Week featuring Simon Says Stamp.
Today is the day one.


We from Winnie & Walter are doing a theme each day of the week where we will feature a Simon Says Stamp products with Winnie & Walter product. Today's theme is rainbow cards.
Here is my take on the theme.

Hey Girl card

I have used Simon Says Stamp Extra Large Dots stencil and sponged distress inks Dusty Concord, Salty Ocean, Peacock Feathers, Mustard Seed, Crushed Olive, Spiced Marmalade and Festive Berries to get the rainbow for the card front. I then used Pretty Pink Posh's Stitched Due 2 rectangle die to die cut the wood grain pattern paper. I then stamped the piggie image from Birthday Farm Animals stamp set on watercolour paper , coloured the image and balloon. Used the coordinating die to die cut the image.

Hey girl horizontal card

I also selectively stamped the balloons from the same image and coloured them using distress inks. I fuzzy cut the balloons and layered and glued them with the balloon in the piggie die cut to form a cluster. This piggie with cluster of balloons is mounted on the wood grain panel using foam adhesive. For the sentiment, I have combined sentiment from Winnie & Walter's Bubble Talk stamp set and the Birthday Farm Animal set from Simon Says Stamp. I also did stamp the "OINK" on couple of balloons. Here is a closeup!

Hey girl closeup!

I love the rainbow colours on the background and the balloons. Very eye catching!
Now if you like to see more rainbow cards, head over to Winnie & Walter blog. Make sure you leave comments on everybody's blog. There is a $25 gift certificate prize from Simon Says Stamp. Yay!

See you tomorrow with another share the love week card :)

My blog signature

Friday, August 22, 2014

Cutting Edge Blog Hop!


Hello everybody,

Welcome to Cutting Edge Blog Hop hosted by Pretty Pink Posh.


I have two cards for you today. For my first card I have used the Stitched Film Strip Die
Here is my card.

Happy Birthday vertical

I decided to go a clean and simple card this time with lots of white spaces including the use of white Stitched Film die which I have used for texture and added dimension. I used the Spring Blooms stamp set from Wplus9 for colour and impact. I have stamped the leaves directly on the card front, then added the white film strip, then popped the stamped flower die cuts on the top.

Happy Birthday flat

 For some glitter, I have used Happy die cut form Wplus9 die cut from pink glitter paper. I stamped the birthday on a strip of white cardstock which I trimmed making an angle end and added below the Happy die cut. Finally embellished with gorgeous Orchid, Pink Blush and Sparkly Clear sequins from Pretty Pink Posh.  Here is a closeup!

Happy Birthday closeup

For the second card, I have used the Pretty Pink Posh's Stitched Duo 2 rectangular die and the Brushstroke kit from Papertrey Ink. Here is my card.

Celebrate

I have used the colourwash pattern paper from the kit on the background. Then die cut the stitched rectangle from the blue pattern paper with the flower cluster on the left corner. I also fuzzy cut the same flower cluster from another sheet of the same pattern paper and layered it using foam adhesive. I have slightly offset the layered cluster of flowers. Then I stamped the sentiment on the top right corner. I mounted this rectangle on the card front using foam adhesive as well. Finally embellished with Amethyst and Pansy Purple sequins also from Pretty Pink Posh.  Here is another angled shot of the card.

Celebrate flat

Come and play along the blog hop because there are some fantastic sponsors giving away prizes. Check out sponsors. Hooray!

Head over to Pretty Pink Posh Blog for more details on how to participate. You can also hop along and get inspired :)

Thanks for stopping by!

My blog signature